Conversation Hearts for the Yard
For Valentine's Day, I wanted something simple, so I opted for conversation hearts. I had leftover wood from a previous project (it was a 8' x 4' piece of plywood I got for $16 at Lowe's, and I used half of that wood so the cost was $8).
I made a template from butcher paper. I probably should have used a compass, but I don't have one so I used a cat toy as the basis for the circles and then used a ruler to get the rest of the lines. Then I traced my hearts onto the wood.


My dad actually taught me how to use the jigsaw. He was the one who cut out my toy soldiers I made for Christmas and I have a new level of appreciation for that project now that I see how hard it is to use the jigsaw! Maybe "hard" isn't the right word, but it was definitely something to get used to. It looks so easy on TV when I see people use them but the vibrations wore me out quickly! But I think by the end, I was getting the hang of it and I'd like to use the tool more. I would definitely like my own tombstones for Halloween (we tried to buy some, and granted we got them from the dollar store and they were made of Styrofoam, but they would not stay in the ground).
So we cut the hearts and sanded down the edges. I used primer I had in our basement left by the people who flipped our house (so zero dollars spent there).
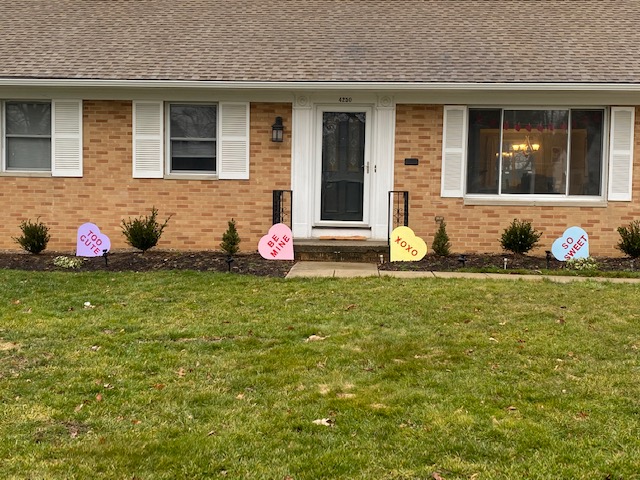
Once they were dry, I painted the hearts pastel colors to match what you'd see when you eat conversation hearts. I also used similar, if not the same phrases you see on the hearts. I could get sassy with them, but they're going to be outside where everyone can see and I opted against it lol.

I glued wooden stakes to the back of the hearts to give them a start for support (these were given to me by my dad - not sure if he bought them or made them himself). My husband and I then drilled holes and added screws, washers, and nuts to make sure the stakes were really on there. We did run into an issue of splitting the wood in one heart, but I used wood filler on it and re-painted, so you'd really never know that problem occurred - especially because these are more meant to be seen from the street.
I made my own stencils for the words and looking back, I probably should have just bought stencils :P I made them by figuring out how many points I would need to make a 5-inch letter in Word (it's 372 point font!) I printed them out at Office Max, but then glued and cut them on cardboard.

I wanted my lines to be really clean, so I started with using painter's tape on the letters (again, probably should have used stencils lol). Once I got the hang of it though, I realized I didn't need all the painter's tape - if I used a smaller brush and took my time, I could stay in the lines easily and it wasn't as much of a hassle.


The final step was to use a water seal on the hearts since they will be outside. I let that dry and they were done! We had previous holes in the ground from my toy soldiers, but my husband dug some extra holes to get the additional hearts in the ground. The stakes are about 9 inches long so they're pretty secure in the ground.
These should last a while - especially if I treat them with the water seal every year. I like the idea of making my own and taking care of them because it was much less expensive than buying something and I think they'll store well.


Comments
Post a Comment