DIY Outdoor Gravestones for Halloween
“I think I need a protractor,” I said to my husband as I grabbed my keys and headed out the door.
I’ve been working hard on my own gravestones for the yard for Halloween décor for the past month. We attempted this last year with store-bought graves from the dollar store, and quickly realized it’s the same as just burning money. The gravestones are made out of foam, which historically does not do well in the wind. Additionally, the “stakes” at the bottom of the graves were only mere inches long. So really, we just paid for trash to get blown into other peoples' yards.
I saw foam graves at Lowe’s and it was the same issue. You would think for $15, they would be a bit sturdier but I don’t necessarily think they are.
Then there’s Grandin Road, which has pretty impressive looking gravestones, but they cost what I imagine an actual gravestone would cost. No thank you.
So, back to my method of using plywood and wooden stakes for what I need.
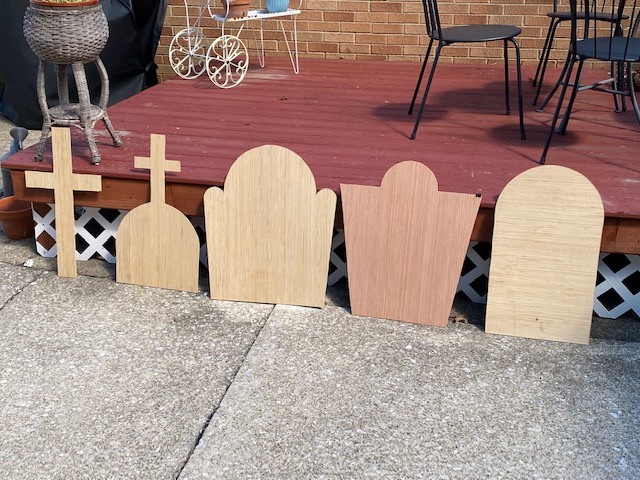
I spent HOURS looking at graves online. And old graves too. I wanted shapes that had some character to them. I found a handful I liked and went to work, but found I needed a compass. And then a protractor. If I wanted to make these look semi-pro, the sides needed to be even. I had to remember how to find supplementary angles. I cursed my schools for not teaching me math as it related to crafting.
I was able to get 5 gravestones from a 4x8’ sheet of plywood. At the time of purchase, the wood was $17 and has since gone up to $21. Still not bad when you remember that a Grandin Road grave is in the $100s.
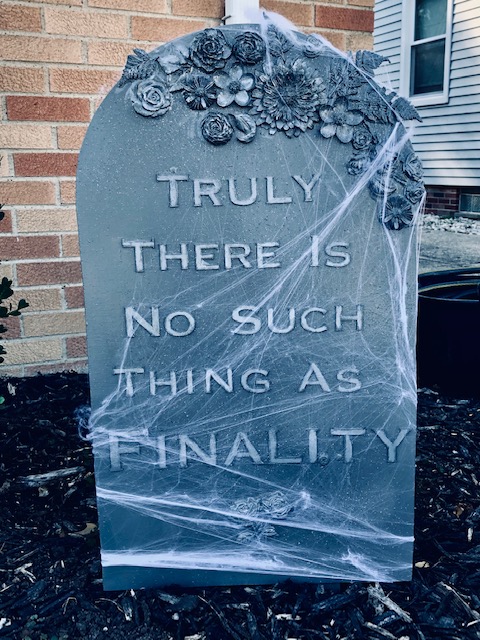
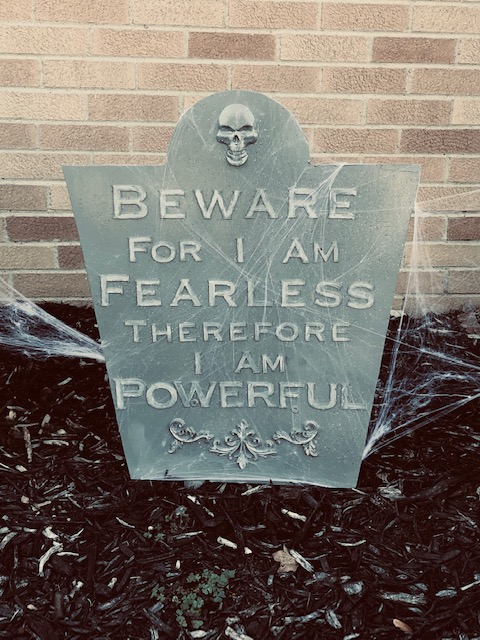
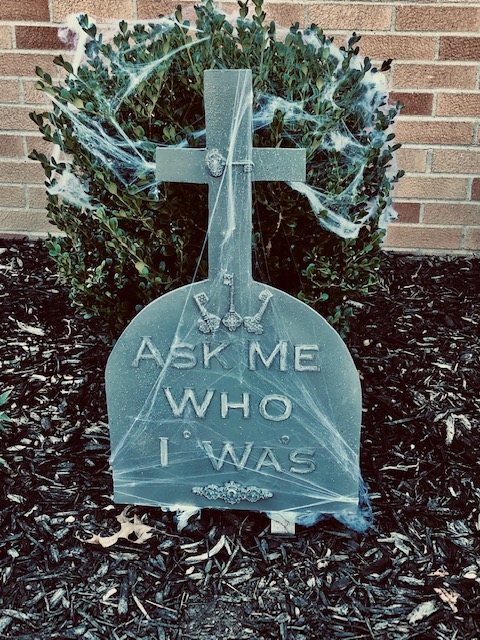
My husband and I cut the shapes using the jigsaw and sanded down the sides. We then used our handy primer left behind by the previous owners.Another reason, aside from cost, that I wanted my own graves was because I don’t necessarily like what’s written on the store-bought ones. I didn’t want them to be punny or too simplistic. I had quotes from TV and books I wanted to use as my epitaphs. But I had the issue of wondering how I would get these quotes onto the graves. Should they be painted on? I didn’t like the idea of stenciling.
I did get a Cricut back in April and had yet to use it (I just didn’t have any ideas at the time). So, I finally brought it out figured I would cut the letters I need from basswood so they would have a raised effect on the stones.
I got a pack of 10 sheets of basswood from Amazon, and had I known what I was doing, 10 probably would have been enough. But since this was my first time using the Cricut, I had a lot of trial and error and needed two packs.Lessons Learned Using the Cricut for the First Time:
- All the YouTube videos that say to tape the wood ALL the way around the mat are correct. I did not do this and it made the blade jump too much, causing an incomplete cut
- There are no updated videos on moving your images/text around the mat because you can literally move it with your mouse before you print to where you need it. I didn't know this and I thought I could only print in the top left forever
- Fewer letters printed at a time made the cuts more accurate. The more letters I tried to jam into one "job," the worse the outcome. Three - four letters at a time was the best way to get what I needed


Comments
Post a Comment